Bleach-Dyeing For Beginners!
- Green Bay Area Mom

- Sep 29, 2020
- 2 min read
As an Amazon Associate, Green Bay Area Mom earns from qualifying purchases.
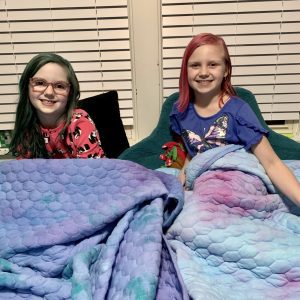
Fun fact: I LOVE tie-dye! I make at least one item each summer for our kids for the last 3 years, and it’s such a fun process. I hunt all year for good “blanks” (white cotton items that would be good projects), and I literally ALWAYS get excited when I find one. Here’s an example of comforters we did earlier this spring. I bought them at Target at the end of back-to-school and saved them for the perfect day.
Apparently, a rainy, cold spring day was it.
I have seen a new trend that is the opposite of tie-dying, and instead uses bleach to remove the color, so I thought bleach dyeing would be a fun project to try.
The first thing to do is to get the items you want to bleach. The higher the cotton percentage, the more drastic the color change will be. So if you want something that’s maybe a little bit more subtle, go with a cotton-poly blend instead of 100% cotton. I just picked up our shirts at a local superstore. While you are there, grab some rubber bands of varying thicknesses and head toward the cleaning supplies.
There are a few different ways that you can get your bleach. I initially planned to do a bleach/water spray. I got a new, dedicated spray bottle and was going to mix up regular bleach and water in equal parts. We ended up switching and going with a bleach gel toilet cleaner (affiliate link). I know it sounds weird, but the gel made it very easy to control for my kids, and not spraying bleach all over the place was more appealing to me. Otherwise, you could use a bleach pen (affiliate link) for smaller patterns/designs. (Using the bleach spray would give you more of an all-over spray look.)
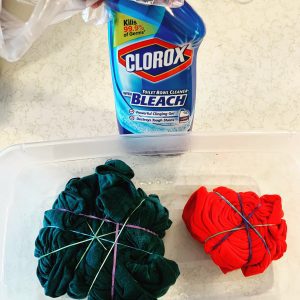
We chose our designs with a quick Google search – the red shirt was chosen to be a classic swirl pattern, and our other shirt was a crumple pattern. We prepared the shirts and ran them under cold water. This is an important step – if you don’t get it damp, the material won’t change color. We got them wet enough that they were a little drippy (super technical term!). Then, we got our gloves on and coated both sides with bleach. After that… we waited (not very patiently!). My shirt took about 30 minutes, the other 2 took about an hour – again, the 100% cotton took the bleach more quickly. We rinsed under cold water, removed the rubber bands, and rinsed again. Next, it was time to wash and dry – make sure you launder your items without anything else for that first load, or you will have more items dyed than you wanted!
Voila – your bleach dyeing project is complete!!!

If you decide to try bleach dyeing, please leave a comment to share with us how it turned out!
Original post by Cathie on 9/29/20


Comments